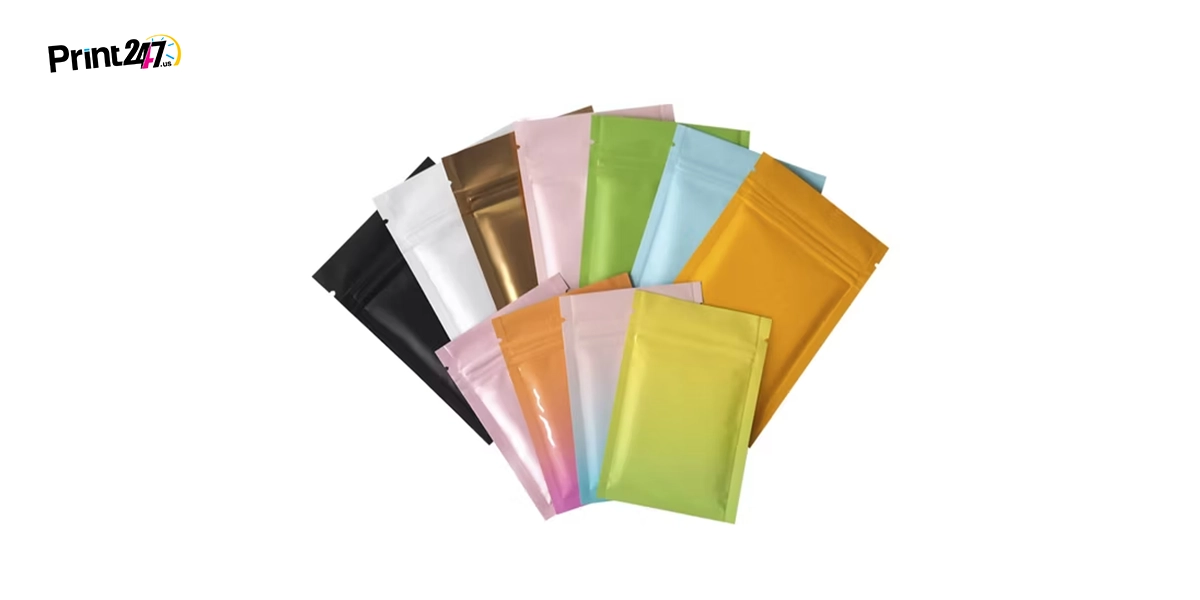
How to Seal Mylar Bags Properly: Tips, Tools, and Common Mistakes to Avoid
.jpg)
To seal mylar bags for long-term storage, fill the bag with clean, dry food, leave 4 to 6 inches at the top, add the right size oxygen absorber, press out extra air, then heat seal the edge with a clothes iron, hair straightener, or vacuum sealer adapter. Check the seal, label, and store in a cool, dark, dry place.
Mylar bags have become a renowned packaging solution that offers safety and attractiveness to various types of products especially food. The best method for preventing spoilage claims when packaging dry food is to use a strong Mylar seal. A sealed airtight packaging prevents oxygen and light from entering. It holds flavor in. Furthermore, it reduces return rates and waste.
Mylar packaging sealing steps are simple once you know the setup. You can seal mylar bags at home with a clothes iron or at scale with an impulse heat sealer. If you're filling 5 gallon buckets, a bucket liner will work well. Also, a flat iron can work well for small pouches.
In this blog, you will learn how to seal a mylar bag the right way, what heat level to use, and how to test your airtight seal. We will cover mylar bag thickness, oxygen absorbers, vacuum sealers, and ways to seal larger bags without buying an expensive machine.
Let’s get started.
What You’ll Need: Materials and Tools for Sealing Mylar Bags
When it comes to product safety and durability, sealing mylar pouches is a must-have tactic. An enduring seal starts with the right parts. Gather your materials and tools before you fill the bag. This cuts error, speeds lines, and keeps oxygen absorbers fresh.
Materials you need for sealing mylar bags
Here is a list of easily available materials you need to seal the mylar bag properly.
Mylar bag (food grade, 3.5 - 7 mil): Choose thickness by product and handling. Thicker film helps for bulk grain packaging and sharp edges. Black or foil finish blocks light. Reusable mylar zippers add consumer ease but still heat seal above the zipper for long term storage.
Oxygen absorber (O2 absorbers): It is sized by bag volume and headspace. It removes oxygen to extend shelf life. Always use fresh packs. Keep the rest sealed while you work.
Dry product for food storage: It can be white rice, beans, flour, oats, pasta, dehydrated or freeze-dried foods with less than 5 percent moisture. Avoid oily items in standard mylar for long term storage.
Labels or marker: Note product, date, lot, and absorber size. Clear labels help audits and FIFO.
Desiccant (Optional): For herbs or sensitive items, you can use desiccant if available. It helps in managing humidity. Please note that do not replace oxygen absorbers with desiccant.
Essential tools you need for sealing mylar bags
Here is a list of essential tools you need.
Clothes iron or flat iron (hair straightener): It’s a budget method. A hair straightener seal works well for small pouches and zipper tops.
Impulse sealer or heat sealer: Fast, repeatable, and safer for teams. Set dwell time and heat by mil thickness. Great for runs and proper sealing on lines.
Vacuum sealer or Foodsaver with mylar adapter: Traditional vacuum units do not seal thick mylar well by default. Use a channel adapter or iron the seam after pulling air for a tight finish.
Clean towel or flat board: Place under the seam to keep pressure even and protect surfaces during heat seal.
Scissors and scale: Trim edges if needed and weigh fill for portion control.
With these simple tools and materials, sealing pouches becomes easy.
The global Mylar bags market was valued at USD 1.2 billion in 2024 and is projected to reach USD 1.8 billion by 2033. (Source: VMR)
General Step-by-Step Process for Sealing Mylar Bags

Mylar bags are highly effective at storing and preserving foods for long periods of time. By doing so, we can make food items more airtight and oxygen-free, thereby extending their shelf life.
You should ensure the product is dry, remove as much air as possible from the bag, and seal it with steady heat and pressure. To test, label, and store your products, make sure they are kept cool, dark, and dry.
Follow these steps carefully:
Step #1: Prepare your contents
Before you seal the bag, make sure items are clean and fully dry. For long term food storage, use low-moisture items. Dehydrated or freeze drying bags should hold food under 5% moisture. You should wipe any powder or oil off the inner top edge of the bag. Having clean edges ensures that your seal is airtight. The oxygen absorbers are kept fresh at the end of the stage.
Step #2: Fill the bag
Fill the mylar bag, leaving 4 to 6 inches of space at the top. Heat sealers are easier to hold, align, and press when they have this headspace. When filling 5 gallon mylar bags, seat the liner in the bucket first, then fill to desired weight. You can settle the product in a bucket or bag by tapping it to reduce trapped pockets.
Step #3: Add oxygen absorbers
Before sealing the mylar, place the appropriate size absorbent on top of the product. Avoid opening all absorb packs at once. Remove one, close the rest. If you must pause, store open absorbers in a small mylar pouch and seal it or use a mason jar with a tight lid. Work in short batches.
Step #4: Remove excess air
The air should be pushed out gently without dislodging the absorbent. You can seal the bag tighter by using a vacuum sealer with a mylar adapter, followed by a heat seal at the edge. Do not crush powders like flour too much. The aim is less air, not compacted bricks.
Step #5: Seal the bag
Heat seal the edge of the bag using your chosen method. A clothes iron, hair straightener, impulse sealer, or flat bar sealer can all work. Seal in a straight line across the full width. You can add a second pass for a double seal, especially on thicker 7 mil bags or heavy fills.
Step #6: Test the seal
Wait until the seam is cool. Test the grip by tugging both sides of the sealed mylar seam. If you can, do a quick water dunk test on a small pouch. See if there are any bubbles. An airtight seal is one that doesn't produce bubbles. When testing bucket liners, press on the edge of the bag to see if any air hisses out.
Step #7: Label and store
Write down the product name, the date, the lot code, and the absorbency size. You should store it somewhere cool, dark, and dry. Use a bucket for protection on large liners. Keep off concrete floors. Rotate stock. Track shelf life of food by product type and target sell-by dates.
How to Seal Mylar Bags with a Clothes Iron at Home?

Sealing mylar bags with clothes iron is ideal for small runs or trials. You can seal mylar bags at home or in a test area without a sealer machine. The household iron method is low cost and easy to train. The pouches work because they are lined with food-grade plastic that melts when heat and pressure are applied.
Steps that work well:
Set the iron to wool or medium-high. Turn off steam.
Lay a towel on a flat surface. Place the mylar bag on it.
Fold the bag top to form a narrow flap. This keeps layers aligned.
Press the iron on the flap for 5 to 10 seconds per pass. Move slowly.
Make 1 to 2 passes across the full width. Wait a few seconds to cool.
Add a second narrow pass above the first for a double seal if needed.
Tips for a better mylar bag seal:
Make sure you apply even pressure. Make sure powder is kept away from the seam. Test settings on a scrap strip first. The iron may have too much heat if the edge is wavy or has pinholes. To prevent the seal from peeling open, increase the time or heat a little. The edges get contaminated with residue, resulting in leaks. Be sure to wipe the inner edge of the top before sealing.
Variation: Hair straightener seal for small mylar bags
If you have a zipper pouch or smaller bag, a hair straightener or flat iron will be of great assistance. Set the heat to medium, close the lid on the edge, and hold for three to five seconds. Work from one side to the other. It is quick and clean for sample packs and cannabis pouches.
How to Seal Food in Mylar Bags for Long-Term Storage?

With Mylar bags, you get a multilayered barrier that prevents oxygen, moisture, and light from entering your package. Aside from preventing spoilage, they also preserve the flavor, nutritional value, and texture of food.
You can seal food in mylar pouches in multiple steps. First fill the pouch or bag with the food you want to store for a long time. After that, remove the excess air with vacuum as much as possible. Now there is a necessary step that you have to perform for food safety. That step is sealing the mylar bag. You can use a heater, hair straightener, or iron for that. At last, label the bag with product name and date. Maintain a cool, dry environment for maximum freshness.
Best items for long term storage:Dry goods do best. White rice, beans, oats, pasta, powdered milk, and flour. Seal flour in smaller bags to reduce clumping. Avoid high oil foods for long term storage unless you plan short timelines.
Oxygen absorbers are key: Use mylar bags and oxygen absorbers together. This combo drops oxygen inside the bag and slows spoilage. It also helps with pests. To store for 10 to 30 years, match the absorbent size to the bag size and headspace.
Moisture and product prep: For dehydrated or freeze-dried foods, keep moisture under 5 percent. Cool product to room temp before sealing. Warm products can give off vapor and weaken the seal.
Storage timeline guide: White rice can reach about 25 to 30 years with proper sealing. Flour often ranges 10 to 15 years. Beans can last 10 years or more. Conditions matter. Cooler storage means longer shelf life.
Info Box:
Properly sealed Mylar bags with oxygen absorbers can extend white rice shelf life to 25-30 years, compared to 1-2 years in standard packaging. The Utah State University Extension's Carolyn Washburn advises removing oxygen from food storage bags to reduce spoilage.
Source: Utah State University
Common Mistakes to Avoid When Sealing Mylar Bags
Occasionally, a small error along the bag's edge can cause the airtight seal to break. You will see a decrease in your failure rate when your teams are trained to pay attention to these trouble spots.
Powder on the seam: Flour or spice on the inner lip will cause leaks. Wipe before sealing.
Wrong heat or time: Too hot gives pinholes. Too cool gives a weak bond. Test on scrap strips to set dwell time for each mil thickness.
Opening absorber packs too early: Oxygen absorbers start working at once. Open only what you will use in a few minutes.
Not enough headspace: If there is no space at the top, you cannot press the sealer flat. Leave 4 to 6 inches.
Overfilling heavy items: Bulk grain packaging gets sharp edges. Overfill raises puncture risk. Use thicker 7 mil bags for heavy fills.
Using traditional vacuum on thick mylar without an adapter: Many vacuum sealer machines cannot grab air from smooth mylar. Use a channel adapter or pull air by hand, then heat seal.
Skipping a seal test: Always tug or water test a sample from each run. Fix settings before you pack a full pallet.
Storing in hot or bright areas: Heat and light cut shelf life. Move sealed mylar to a cool, dark, dry spot.
Avoiding these issues keeps oxygen out and shelf life high. It also lowers chargebacks and keeps retail partners happy.
Final Thoughts
Sealing mylar bags is not as hard as some people might think. It is a repeatable process that any pack team can learn in a day. Start with clean, dry goods. Make sure the mylar bag thickness is appropriate for the type of food being stored. It is important that the oxygen absorbers match the size of your bag. After pressing air out of the bag, seal it with heat and test it. The little things add up. Your stored food keeps its flavor longer, your claims drop, and your partners trust your dates.
Need custom mylar printing, zipper options, or bulk sizes for B2B production. Print247’s team of packaging engineers and creative designers is available to assist you in this matter. We are a leading mylar packaging supplier in the US with free design support, eco-friendly materials, fast shipping, and physical samples for sign-off. If you want branded bags for long term storage or retail, our team will guide your specs and get you moving fast.
FAQs
How to seal Mylar bags without a sealer?
You can use a clothes iron or a hair straightener to straighten your hair. Set the temperature to medium-high without adding steam. You can make a second pass if you need to by pressing the edge for five to ten seconds and placing the bag on a towel. Just before you close the seam, make sure the inner lip is clean and that the oxygen absorbent is added.
Can we vacuum seal Mylar bags?
Yes, but most vacuum units need help to pull air from smooth mylar. Place a small strip of channel bag at the edge so the pump can draw. After vacuum, heat seal the mylar with an iron or impulse sealer. This gives a strong airtight seal for longer shelf life.
What temperature do you seal mylar bags at?
Irons and flat irons do not show exact film temps, so think in settings. Start at wool or medium-high. For impulse sealers, set dwell time for the bag mil. Make test strips to dial in. The right setting makes a smooth, even band without warping or pinholes.
How to seal mylar bags with flat iron?
Heat the hair straightener to a medium setting. Grab the bag's edge and hold for 3 to 5 seconds. You will need to take small steps along the edge until you reach the other side. When sealing zipper pouches, seal just above the zipper. Make a second pass to ensure a double seal.
How to seal Mylar bags without heat?
You cannot get a long term airtight seal without heat. You can press air out and use a zipper for short holds, but oxygen will get in. For long-term storage, you need a heat seal from an iron, straightener, impulse sealer, or a machine that makes a melt bond.
What is the purpose of sealing mylar bags?
It is critical to maintain the product's quality by keeping oxygen, light, and moisture out. Sealing a mylar bag with the right absorbent helps hold flavor, color, and prevents spoilage. Also, it keeps your supply chain's shelf life predictable and lowers returns.
How to vacuum seal Mylar bags using a Foodsaver?
Cut a thin strip of Foodsaver bags and place it in the mylar opening so the pump can pull air. Run the vacuum. Once air is out, seal the mylar edge with a clothes iron or impulse sealer. This hybrid method gives you the vacuum benefit plus a strong heat seal.


.jpg)
.jpg)
.jpg)