


How to Print on Cardstock? Step-by-Step Guide for Perfect Results
.jpg)
To print on Cardstock, first choose the right type of cardstock. Then adjust printer settings and use the manual feed or rear bypass tray to ensure a straight paper path. After that, load the cardstock into the designated manual. Finally, print and let it dry.
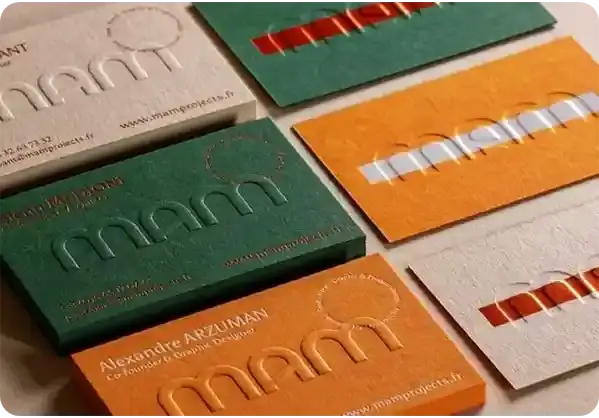
Cardstock printing is the process of using a thicker paper and printing it with a valuable image. For a business, it means product tags, table tents, menus, or small marketing cards. It is something different from printing on normal paper sheets. The reason is that cardstock is thicker than normal paper sheets.
Now brands are searching for how to print on cardstock only after they waste some paper sheets, jamming the printer and ruining the colors. It’s a simple and straightforward process if you follow the simple steps.
To make you aware of cardstock printing, we have written this step-by-step guide so you can print small or medium prints in-house. We shall also guide you about cardstock printer settings, loading & feeding, and printing thick cardstock without jamming the printer.
Let’s start the blog.
Key Takeaways:
Match cardstock weight to your printer spec sheet
Use a rear or manual feed for thicker card stock
Pick heavy media in the cardstock printer settings
Run one test sheet before full print on cardstock jobs
Let the ink dry fully before stacking or trimming
Move large runs to a pro print partner when needed
Step 1: Choose the Right Cardstock?
Choosing the right cardstock is the first and foremost step of cardstock printing. The reason is that wrong cardstock choice can be costly, leading to jams, curling, and fading ink, even if your design looks nice on screen.
For most office printers, light to medium card stock works best for business cards, rack cards, and small point-of-sale pieces. If you are planning to print or laser on the paper, make sure it is a smooth or semi-gloss cardstock, not just “scrapbook” stock.
Also, you need to pay close attention to the cardstock weight on the pack or the specification sheet. Your printer manual lists the weight range it can handle. When using heavy cardstock, stay within the range of the feed rollers to ensure the sheet can grip the sheet.
Here is a quick guide your team can save:
Paper type | Approx. weight (GSM) | Common use |
Regular copy paper | 70 to 90 | Everyday office documents |
Light cardstock | 160 to 220 | Postcards, menus, product inserts |
Heavy cardstock | 230 to 300 | Covers, premium cards, and tent cards |
If you want to print on thick cardstock for premium pieces, you may need a device classed as the best printer for cardstock in your budget range or move part of the run to an outside supplier.
Step 2: Check Your Printer Compatibility
Checking your printer’s compatibility is also an essential step in the cardstock printing process. To check it, first look in the printer manual or on the maker’s site for the “supported media” table. There should be a section for "card stock," "heavy paper," or at least a higher gsm range than copy paper. This tells you the device is able to print on cardstock within that range.
Most business inkjet printers and laser units can handle at least light card stock if you use the right tray and settings. Some models, like an Epson printer with a straight rear feed, are better cardstock printer settings candidates than desktop devices with tight internal turns.
If your spec sheet shows only regular paper, think twice before printing on cardstock. You risk worn rollers, smeared ink, or a voided warranty for that device.

Step 3: Set Your Printer for Thick Paper
Setting the printer for thick paper ensures the printing process fits thicker sheets. You need to tell the device how fast to move the cardstock sheet, how much heat to use, or how much ink or toner to lay down.
Here are some essential print settings for accurate prints.
First, open the print settings on your computer
Second, look for the “Media type” or “Paper type” drop-down
Now change it from “Plain” or “Copy paper” to “Card,” “Heavy,” or the closest paper type match
You can choose a “High” or “Best” mode for your prints if your device lets you adjust print quality. This process slows the sheet feed and helps the ink sit clean on the surface.
Step 4: Load Cardstock into the Printer
Now load the cardstock into the printer tray following the correct path. The cardstock paper needs a smooth, steady feed from the tray to exit. You can use a manual feed slot if your device has one. This tray proves helpful and gives a straighter path with fewer bends.
Heavy cardstock can stick together and cause double-feeds. Keep the adjustable guide snug against the stack so the sheets do not drift to one side during the cardstock printing process.
When you print on cardstock that is pre-scored for folding, make sure the fold direction lines up with your printing device’s recommended path. This keeps score lines clean for greeting cards, holiday cards, or any type of speciality card.
Step 5: Print A Test Page
The next step is printing a single cardstock sheet before you send the full print job. A test page helps you check and protect your cardstock, your inkjet printer or laser unit.
Follow this process to print a test paper.
Start by sending one page with your artwork scaled to full size.
Check margins, card size, and any trim marks your document needs. Make sure the card design lands where you planned, especially for double-sided pieces.
Look at color density, fine type, and any areas with large ink coverage.
If the ink looks too wet or the sheet curls, lower coverage in your file, or try a lighter media setting for that cardstock paper. If your test looks good, save those cardstock printer settings as a preset with a clear name your team will recognize later, such as “Menu card 200 gsm rear tray.”

Step 6: Print the Full Job
Now it’s time to print the full cardstock printing job if your test page comes out with no smudges and no jams. Run the full batch in controlled groups so you keep quality steady. Rushing to a large run will also lead to jams or color shifts.
Follow this process to print the full job.
Don't load your entire stack of cardstock paper at once, but instead load it in small stacks. This prevents rollers and cartridges from being overstressed and helps the feed remain consistent.
After the device has been turned on, stand by for the first 10 to 20 cardstock sheets. Keep an eye on the feed's handling of the stock and check output for streaks, marks, or misregistrations. You should pause the job, fix the cause, and restart it if you see an issue.
For double-sided pieces like menus or premium business cards, let side one dry or cool before putting sheets back in the tray for side two. Then mark your stack with a small pencil arrow so that you don't lose track of the printing process.
Step 7: Let the Prints Dry Completely
The final step is letting the prints dry completely and rest so the surface stays clean. This step matters the most for inkjet printer output. Inks used in printers take time to fully cure on the cardstock surface. Touch-drying the ink on the cardstock may take up to 5 minutes, and it may take 24 hours to fully cure.
For laser devices, let the pile cool so the fused toner hardens before trimming or folding. Upon drying, you can choose your final card size by trimming options. When printing postcards, holiday cards, custom political cards or branded thank-you cards, use a stack cutter or trimmer for straight edges.
Final Thought
To sum up this article, we can say that if you handle your cardstock printing like a simple process rather than a gamble, you can enhance your in-house printing game for short marketing runs.
Here are some tips for making quick custom print samples, inserts with QR codes, or business cards with QR codes. Pick the right stock, ensure the device can handle it, fine-tune the printer settings, load with care, test, and let prints dry before trimming and packaging..
When you need larger volumes, special coatings, or custom shapes, it is smart to move beyond desktop cardstock printing. This is where a reliable printing products supplier like Print247 becomes a useful partner for your brand.
Print247 is a leading packaging supplier in the US that supports businesses with custom boxes, cards, flyers, brochures, and other print pieces. You get free design support,
Get a Quick Quote

More Articles
 Bill ‘Hogg’ Ryan
Custom Boxes for Cosmetics & Beauty Products: Packaging That Sells
 Bill ‘Hogg’ Ryan
Custom Boxes Wholesale: How Bulk Ordering Saves You Money
 Bill ‘Hogg’ Ryan